Ingredients:
1kg. A.P. Flour
650ml. Water (92F)
22gr. Kosher Salt
25gr. Fresh Yeast
15gr. Dough Conditioner
84gr. Sourdough (We used dough from previous batch 3 days prior)

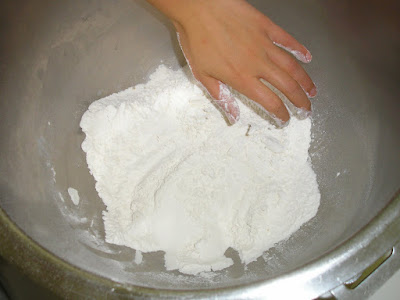
1) We buried the yeast into the flour. This helps protect the yeast when we next added the salt and conditioner.
The idea is to incorporate all the dry ingredients evenly before using the mixer.

Divide the dough in two. Knead the dough into a tight ball.

Once shaped, let rest for 1 hour in a covered bowl in a warm spot. Punch the dough down, return to the floured table.

Roll the dough into "pizza dough" shapes.

Roll said pizza shaped doughs into cylinders. Let rest for 20 minutes covered, in a warm spot.
Use the mixer on 2nd setting with a dough hook. First add the Sourdough, let it incorporate. Add half the water. Gradually keep adding water slowly, avoiding putting in to much. (We found it perfectly takes 650ml.) Let the dough hook knead until stretching the dough thin between your finger, you can see thin "stretch marks" against a light. Remove onto a floured table top.

Divide the dough in two. Knead the dough into a tight ball.

Once shaped, let rest for 1 hour in a covered bowl in a warm spot. Punch the dough down, return to the floured table.

Roll the dough into "pizza dough" shapes.

Roll said pizza shaped doughs into cylinders. Let rest for 20 minutes covered, in a warm spot.
So far, so good?

Please observe; Once rolled out, the dough must proof for an hour. BE SURE TO LAY THE SEAL LINING ON THE BOTTOM! ..or you will not have a GREAT baguette, it will only be GOOD baguette, which is not to our standards is it?

Here is the dough pre-proofed SEALED SIDE DOWN. Cover, let it sit in a warm spot (we like the top of our stoves for this purpose). We proof until it increases in size 80%.
The fun part; Roll out each cylinder to form into a thin looking baguette. You will know if you rested the dough long enough, because at this point it will not offer resistance to being stretched and rolled like "Play-Doh!". (<-Is that considered "schtick" humour?)

Please observe; Once rolled out, the dough must proof for an hour. BE SURE TO LAY THE SEAL LINING ON THE BOTTOM! ..or you will not have a GREAT baguette, it will only be GOOD baguette, which is not to our standards is it?

Here is the dough pre-proofed SEALED SIDE DOWN. Cover, let it sit in a warm spot (we like the top of our stoves for this purpose). We proof until it increases in size 80%.
This is the dough after proofing is complete. Using a razor, slash the top for aesthetic appeal (Now aren't you glad you placed the sealed lining downwards earlier?).

Using a mixture of Egg White and Water, we egg-washed the surface before putting the bread into the convection oven for 50 minutes @ 350F.
To be sure when the dough is finished baking, tap on it! If it sounds hallow, it's good ...GREAT to go.

Using a mixture of Egg White and Water, we egg-washed the surface before putting the bread into the convection oven for 50 minutes @ 350F.
(35 minutes into baking, spray some more water onto the bread for a great crispy crust)

To be sure when the dough is finished baking, tap on it! If it sounds hallow, it's good ...GREAT to go.
Enjoy!
I have had a lot of fun the last while coming up with an awesome baguette recipe. Breads are beautiful and very gratifying to produce. I don't bake often enough, so I am glad I did this. I intend to push harder in this area.
I have had a lot of fun the last while coming up with an awesome baguette recipe. Breads are beautiful and very gratifying to produce. I don't bake often enough, so I am glad I did this. I intend to push harder in this area.
The great baguette stems from a great recipe, honed in by technique. I have to thank my friend Pastry Chef Vanessa Fiorini, who not only provided the final recipe, but did most the honing of the product as well.
-Jerek


No comments:
Post a Comment